
The Homeowner’s Complete Insurance Claim Appraisal Guide
- clamiumappraisals
- Aug 15, 2025
- 5 min read
A step-by-step roadmap from confusion to resolution
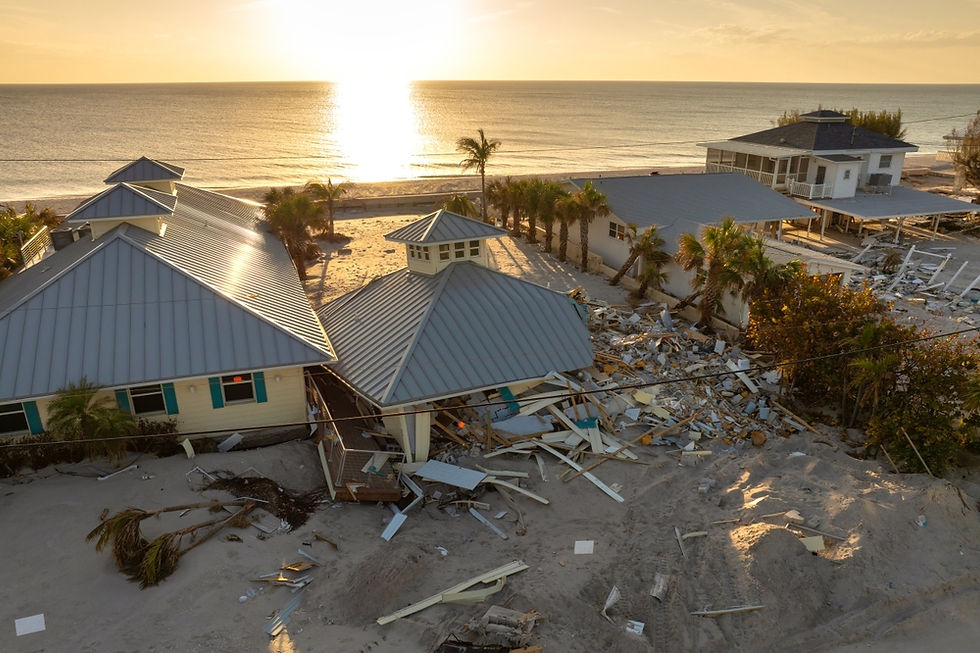
When a storm, fire, burst pipe, or other disaster damages your home, you expect your insurance to step in and make things right. Most of the time, the claim process runs smoothly: you file, the insurance adjuster inspects, and you receive a payout to cover your repairs. But sometimes, the amount your insurer offers doesn’t seem to match the damage you’ve experienced. You might feel frustrated, unsure whether you’re missing something, or worried you’ll be stuck paying the difference out-of-pocket.
That’s where the insurance appraisal process comes in—a formal but straightforward way to settle disagreements over the value of your loss. It’s not about fighting in court, and it’s not about challenging your coverage terms. Instead, it’s about finding an objective number that’s fair to both sides.
Below is a complete, step-by-step homeowner’s guide, designed to take you from first realizing there’s a disagreement to walking away with a final, agreed-upon amount you can use to move forward.
Step 1: Understand What the Appraisal Clause Is
Most homeowners insurance policies include an appraisal clause—a section that explains how disputes over claim amounts are resolved. It’s important to note that appraisal only applies to the value of the loss, not whether the loss is covered in the first place.
Example:
If your insurer says hail damage to your roof is worth $7,500 and you believe it’s closer to $14,000 based on contractor estimates, appraisal can be used.
If your insurer says the hail damage isn’t covered at all, appraisal won’t change that decision.
Why it matters: Understanding this distinction prevents you from wasting time on a process that can’t address your core issue.
Step 2: Decide if Appraisal is the Right Tool for Your Situation
Before you jump into an appraisal, ask yourself:
Is the disagreement strictly about dollar amounts?
Have I already tried negotiating directly with the adjuster?
Do I have evidence—like contractor bids, repair invoices, or expert assessments—that supports my valuation?
Tip: If the answer to the first question is “no,” you may need to look into other resolution options, such as filing a formal complaint with your state’s insurance department or hiring an attorney.
Step 3: Make a Written Request for Appraisal
If you decide to move forward, you’ll need to formally request an appraisal in writing. This isn’t just a courtesy—it’s a requirement in most policies.
Your letter should include:
Your name, policy number, and claim number
A clear statement that you are invoking the appraisal clause
Your chosen appraiser’s name and contact information (more on choosing below)
The date of your request
Timing is key: Policies often set strict deadlines, such as 20 or 30 days from the date of disagreement. Missing this window can remove your right to use appraisal.
Step 4: Choose the Right Appraiser for You
This person becomes your voice in the process, so choose carefully. Your appraiser should:
Have strong experience with your type of property damage
Understand construction methods, local repair costs, and materials
Be skilled at documenting and explaining valuations clearly
Be independent—not tied to your insurer or the contractors bidding on the work
Think of your appraiser as your personal advocate for the number you believe is correct. You’re responsible for paying their fee, so see it as an investment in getting a fair result.
Step 5: Understand the Role of the Insurance Company’s Appraiser
Once you name your appraiser, the insurance company will select their own. Their job is the mirror image of yours: to assess the loss and determine what they believe it’s worth. These two professionals will then work together to try to reach agreement.
It’s important to keep communication respectful—while they’re on opposite sides, both appraisers are bound by professional ethics to aim for accuracy.
Step 6: The Umpire Selection Process
If the two appraisers can’t agree, they’ll choose a neutral umpire—someone both sides trust to break the tie.
How it works:
The umpire reviews both appraisers’ reports, estimates and evidence.
The umpire’s fee is typically split between you and the insurance company.
Step 7: How Appraisers Evaluate Your Loss
Your appraiser will start by reviewing:
The original claim documents and adjuster’s report
Photos of the damage (before and after temporary repairs)
Contractor bids or repair invoices
Material and labor costs in your area
Specialized reports (for example, moisture mapping after water damage, or core samples for roof damage)
They may also conduct an on-site inspection to measure, photograph, and verify details firsthand. This thorough approach ensures their valuation is based on hard evidence, not guesswork.
Step 8: The Appraisal Meeting
In many cases, the two appraisers will meet—physically or virtually—to compare their findings line by line. They’ll discuss differences in scope (what work is needed) and pricing (what that work should cost).
Example:
One appraiser might price replacing a certain type of siding at $15 per square foot, while the other lists $11.
They’ll look at local supplier costs, recent jobs, and material availability to reconcile the number.
Step 9: When the Umpire Gets Involved
If they can’t resolve all differences, the remaining disputed items go to the umpire. Think of this as the “final decision-maker” stage—it’s typically faster and less adversarial than going to court.
The umpire’s role isn’t to split the difference but to choose the value that is best supported by the evidence.
Step 10: The Final Award
If the two appraisers agree then the award will be signed and sent to the insurance carrier. Otherwise it will get sent to an Umpire who will make the final decision then that number becomes binding. The insurance company will then pay you that amount, minus any applicable deductible.
This award is not appealable through the appraisal process—once decided, it’s final.
Step 11: Common Misunderstandings About Appraisal
It’s not a coverage decision: Appraisal won’t add coverage your policy doesn’t have.
It’s not free: You pay your appraiser, and possibly part of the umpire’s fee.
It’s not endless: There are strict timelines at each stage.
Step 12: Preparing for Appraisal as a Homeowner
You can make your appraiser’s job easier (and your case stronger) by:
Organizing all documents, receipts, and photos related to your loss
Providing access to any previous inspection reports
Listing any repairs or temporary fixes you’ve made
Being available to answer follow-up questions promptly
Step 13: After the Appraisal
Once the award is issued and payment arrives, you can move forward with repairs knowing you’ve resolved the valuation dispute. It’s a good time to:
Review your coverage to see if limits are sufficient for future risks
Update your home inventory list with current values
Consider whether you need additional coverage types, such as flood or sewer backup
Why This Process Protects Homeowners
The appraisal process exists so neither side is stuck accepting a number they believe is unfair. For homeowners, it’s a way to bring in qualified, independent voices to cut through the tension and get to a fair resolution—without spending years in court.
Handled thoughtfully, it can transform frustration into closure, giving you the resources you need to restore your home and move on. Contact us for your appraisal needs.


Comments